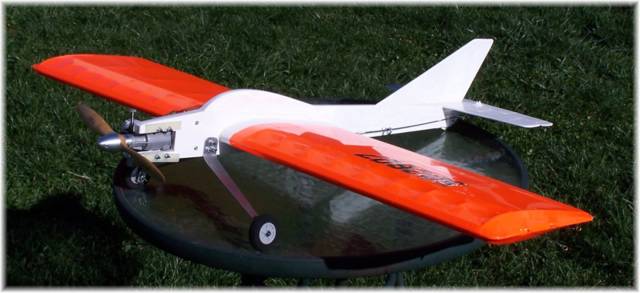
Platter! 
posted by chanlau1 | 7:46 PM
|
0 comments
![]()
![]()
Control line sport flyer's forum for musings, experiences, thoughts, obsessions, creative ideas, etc. Of course I would rather be flying.

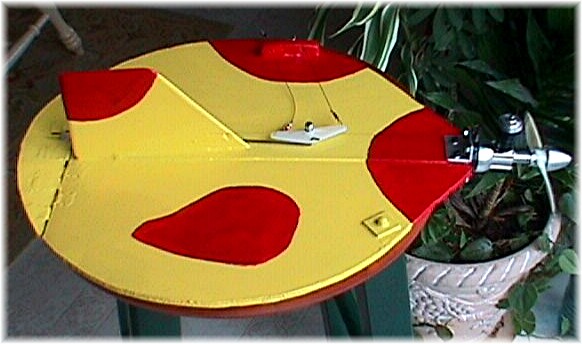
Ho! Ho! Ho! Have you checked out the Aeromaniacs website yet? (www.aeromaniacs.com) One of the highlights of that website is the plans and instructions for the Osborne platter. It only took me three years to understand how to make the motor mounts. They are just two pieces of L-bar aluminum cut off a longer piece purchased at almost any hardware store. Only problem is, I never that hardware stores carried L-bar aluminum. In fact I did not even know what L-bar aluminum is. Finally, after feeling like an idiot for a long time, I was wandering around Home Depot, and I saw some L-bar aluminum, and the light dawned on Marblehead. Oh! That's the stuff for the motor mounts on the Osborne platter! So I bought $3.00 worth of L-bar, and now I have enough for at least a dozen platters.
But, really, isn't it just the neatest little sport flier. I have not flown it yet. But one of these days I will. And then I will blog about it.
posted by chanlau1 | 7:33 PM
|
0 comments
![]()
![]()
Looks like the Magician 40 has flaps. I guess I finally made the decision. It was agonizing. But-what the heck! My last Magician did not have flaps back in the 1950's. So maybe it is time to make a better Magician.
posted by chanlau1 | 7:23 PM
|
0 comments
![]()
![]()
This really is Santa's Saucer. He uses it on Mars to deliver presents to the human children on the red planet. It is painted in Martian camoflage so that Santa won't be seen by the Martians as he speeds on his deliveries. HO! HO! HO!
Merry Christmas!
Happy Holidays!
Happy Hannukah!
Happy Kwanza!
Happy New Year!
posted by chanlau1 | 6:37 PM
|
0 comments
![]()
![]()
Good sport flyer. Performs inside and outside loops, horizontal, vertical, and overhead eights, wingovers and reverse wingovers with ease. Stays out on the lines just fine. Looks pretty good in the air. Too bad Sterling-Estes doesn't make then anymore.
posted by chanlau1 | 6:15 PM
|
0 comments
![]()
![]()
Enya 19-V standard engine. Mounted on phenolic engine pads. Three ounce Brodak fuel tank with standard vents held on over foam with bicycle spokes and rubber bands. 8x 6 prop. The engine is a traditional (plain bearing, cross-flow scavenged, with an iron piston running in a steel liner) setup. Runs well. Plenty of power for this plane.
posted by chanlau1 | 6:05 PM
|
0 comments
![]()
![]()
The wings on this one are covered with Sig Coverall. The plane then got two coats of nitrate dope. Then four more coats of butyrate clear dope. Then the fuselage and tail feathers were painted with Red Devil polyurethane oil enamel. Then three more coats of butyrate clear on the wings. The finish looks good and has held up well. But now I try not to use dope any more. It just smells too bad. Thankfully there are alternatives.
posted by chanlau1 | 5:58 PM
|
0 comments
![]()
![]()
Can you believe they called it that? This turned out to be a great kit. Too bad they are already out of production. This one is made stock except I threw out the cheap plastic wingtips and made my own 1/4 in. balsa plank wingtips. The kit makes a straight, light wing easily. It looks like a Ringmaster, flies like a Ringmaster, maybe it is a Ringmaster (JR).
posted by chanlau1 | 2:16 PM
|
0 comments
![]()
![]()
Just having fun with a few pictures of my planes and GIMP.
posted by chanlau1 | 5:22 AM
|
0 comments
![]()
![]()
O.S. 35 FP converted to C/L with O.S. parts. The venturi is an O.S. 25 FP-S venturi. And I added a head gasket. Other wise the engine is stock. It has awesome power and torque. The plane is a little heavy, but with this engine that doesn't matter much. This thing starts easy and runs steady with minimal vibration. The engine has ABC construction with Schnuerle porting and a plain bearing supported crankshaft.
The fuel tank is a 4 oz. Snubnose with standard vents from Smith Model Products.
The prop is 10 x 6 EW.
This stays out on the lines during overheads and anything else yoou want to do.
Vive la Ringmaster!
posted by chanlau1 | 8:48 PM
|
0 comments
![]()
![]()
The original finish on this plane was a combination of Sig and Aeroglass dope. After ten years it looked pretty bad. The wings are covered with K&S silk. It still has the original finish on it. And it is still tight. I left the original finish on the wings because I was afraid painting over them would increase the weight of the plane too much. And I also did not want to take on the amount of work required to remove the silk, recover, and refinish. So this rebuild was a compromise. And it worked out O.K. as far as I am concerned.
Just want you guys to know I have some planes with a lot of mileage on them.
posted by chanlau1 | 8:38 PM
|
0 comments
![]()
![]()
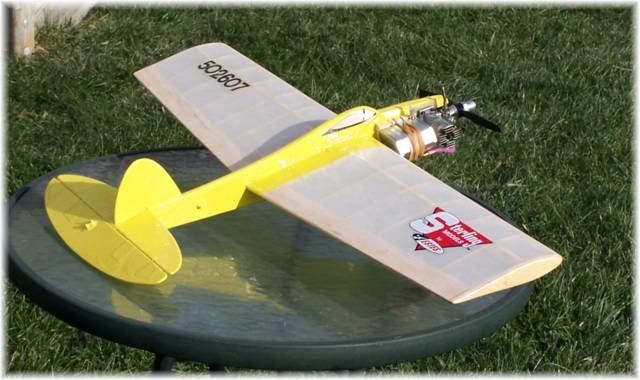
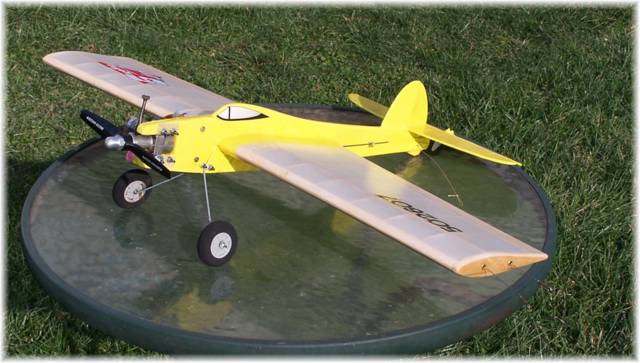
Believe it or not both of these pictures are of the same airplane. I built it in 1993. It has hundreds of flights on it. This is probavly the seventh engine and tank setup. It has hit a fence during a landing after the engine quit. And it has hit the ground pretty hard a few times. And it has flipped over countless times.
But I rebuilt it this summer. The main requirement was to cut out part of the old oil-soaked and crushed motor mounts and replace them with fresh ones. This was done by using 3/4 in. wide motor mount stock for the replacements. This makes it easy to do. The only other thing I did was to sand the old finish on the part of the plane now yellow, then to give it one coat of old nitrate dope, and then to give it two coats of Red Devil polyurethane oil enamel. I also replaced the old tank mount with new bicycle spokes. I also mounted the engine on offset engine pads from Brodak.
All in all, it was a pretty quick and easy rebuild.
So now I have an old Ringmaster that looks better than it used to and flies better than ever.
posted by chanlau1 | 8:23 PM
|
0 comments
![]()
![]()
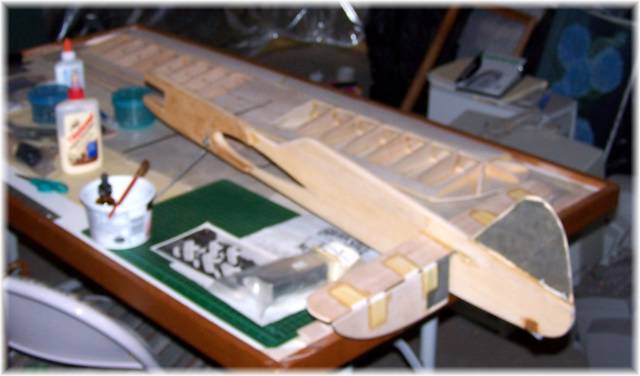
I know it is supposed to be a Magician 35. But I am planning to power this one with a Fox 40 BB ABC Deluxe. So I call it a Magician 40. I started it in 1998. I assembled the profile fuselage and set it aside until last spring. Then I began constructing the wing. Now the wing is almost finished. Probably in another month or so this plane will finally be ready to fly. But before then, I have to decide whether to put flaps on it. I have the flaps made. But recently someone informed me that the instructions on the original Midwest kit showed flaps as an option that might result in better turning ability.
I remember the Midwest Magician I had as a teenager as being without flaps. This one is being built from a Golden State Models kit. It simply shows the plane with flaps. That bugged me because I don't remember flaps on my old one. But now that I know that flaps were optional, I realize I could finish this one without flaps. But on the other hand the flaps might result in better performance. But the performance will improve a lot because our modern ABC engines are a lot better than the engines we had back in the 1950's. So who knows what I will decide. To flap or not to flap. That is the question.
posted by chanlau1 | 8:11 PM
|
0 comments
![]()
![]()
That dog has a way of getting in pictures when I am making other plans.
This Skyray has about 15 flights on it. It stays out on the lines during overheads or anything else one wants to do with it. The engine runs are good. This plane flies better than I do.
And I can see it!
posted by chanlau1 | 7:43 PM
|
0 comments
![]()
![]()
Magnum XL 32 BB ABC. Modified for stunt by Tom Dixon. Stunt timing, true venturi, O.S. needle valve assembly. Smith Products 4.0 oz. Snubnose fuel tank with standard vents. Tank held on with bicycle spokes and rubber bands with 1/2 in. R/C foam under the tank. Engine mounted on offset mounting pads from Brodak. Nice steady stunt runs.
posted by chanlau1 | 7:32 PM
|
0 comments
![]()
![]()
Should mention that the rudder and the fuselage sides are covered with carbon fiber veil cloth. The wing and tail joints are also reinforced with carbon fiber veil. My feeling is that if I don't build it with the veil, I will have to add it later during repairs. So I just might as well use it during the building process and avoid most of the repairs later.
posted by chanlau1 | 7:25 PM
|
0 comments
![]()
![]()
The wings were covered first on this Skyray with Oracover. The Oracover is a fabric that is also finished with paint at the factory and heat-shrinkable. I love it. It is much easier for me to get a half way decent looking covering job out of it, than it is with some of the other coverings out there.
After the wings were covered, I gave the rest of the plane two coats of water based clear polyurethane. Then I applied two coats of Red Devil polyurethane enamel. A decent looking, tough, fuel proof finish.
I would like to say that the Sig Skyray kit is really well done at the factory. The die cutting is really good. The parts were in real good shape when removed from the sheets in this kit. And the kit is easy to build. It only took me three weeks to build this plane.
posted by chanlau1 | 10:40 AM
|
0 comments
![]()
![]()